Cinema One Optical Drive Replacement
BackgroundPlease refer to Troubleshooting Import Issues for help with importing optical discs. If the issue is due to a failed optical disc drive (ODD) in a Kaleidescape Cinema One, contact your local Kaleidescape dealer for service kit availability. The following procedure details how to install a optical disc drive (SVC-KIT-0060).PreparationBefore you begin, you will need:
Service Kit Parts
- Replacement optical drive
- Replacement rear label
- Return Shipping label (use the box you received the replacement drive in to ship back the removed drive).
Tools Required
- Phillips screwdriver
- Container for collecting screws as they are removed
- A flat surface large enough to accommodate your opened Cinema One
- Wire cutters
- Hair dryer or heat gun (optional)
Before you start
1. Disconnect the power cord, Ethernet, and audio/video cables, wireless dongle and any other connections from the back of the Cinema One System.
2. When reinstalling screws, do not over tighten.
3. The Cinema One uses semiconductors that can be damaged by electrostatic discharge (ESD). When handling, care must be taken to ensure that devices are not damaged.
Removing the Rear Label
Although the kit includes a new rear label it is better to be able to reuse the installed rear label as it includes the serial number. Use extra care when removing the rear label.
1. Starting at one corner, slowly and carefully remove the Rear label from the unit. Applying heat to the label using a hair dryer or heat gun can aid in the removal of the label. Take care not to overheat the label as this can damage it.
2. As adhesive loosens, peel off the rear label. See Figure 1.
3. Set the label aside, adhesive side up, to be reinstalled once the inspection is complete and the unit has been reassembled.

Exposing the Optical Drive
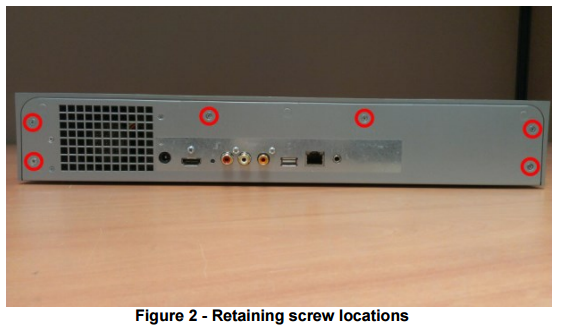
1. Remove 6 screws from the back, using the Philips screw driver. See Figure 2 for screw locations.
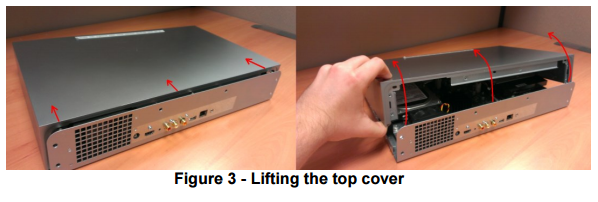
2. Slide the cover forward slightly, until it clears the locating pins on the rear panel, and lift from the rear edge to open the Cinema One. Do not move it more than necessary as this could dislodge the cable connecting the front bezel to the chassis. See Figure 3.
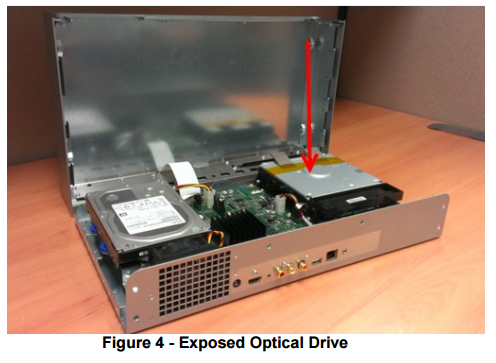
3. Tip the top cover forward and leave it standing in front of the chassis. See figure 4.
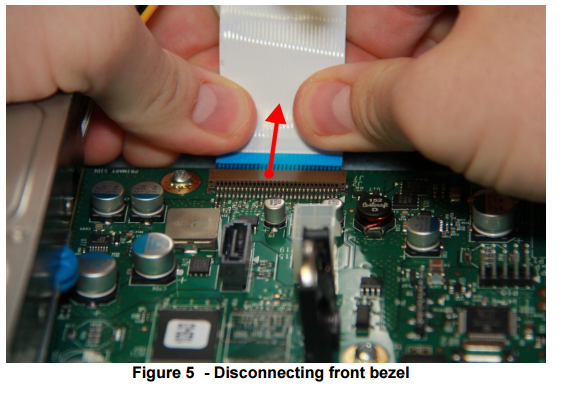
4. Pull evenly across the ribbon cable to remove it from the system. See figure 5. Set the top cover to the side.
Replacing the Optical Drive
1. Disconnect the 3 cables connected to the rear of the optical drive. Note that the middle connector (SATA data) is a locking connector. Press down on the metal tab to release. See figure 6.

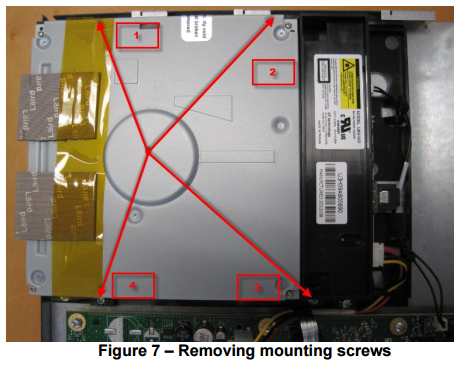
2. Loosen and remove the (4) screws securing the drive to the mounting plate. See figure 7.

3. Carefully remove the optical drive from the chassis and set aside, to be returned to Kaleidescape using the box and provided shipping label.
4. Remove the new drive from the Service Kit you received and install it in the same location as the one you removed.
5. Replace the 4 screws to secure the drive in place on the mounting bracket. Take care not to over tighten.
6. Re-Insert the 3 cables into the new drive, ensuring that they are fully seated and locked.
Reassemble the Cinema One
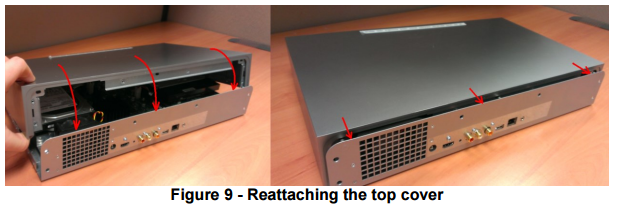
1. Stand the top cover in front of the system.
2. Insert the ribbon cable from the top cover back into the board connector. Apply pressure evenly across the cable. See Figure 9.
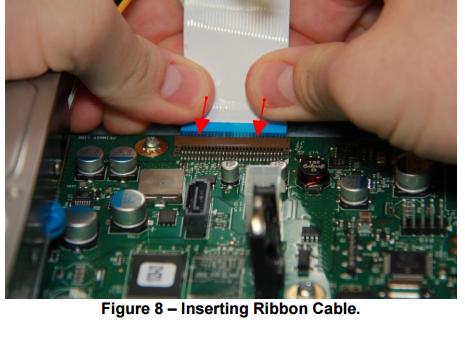
1. Stand the top cover in front of the system. 2. Insert the ribbon cable from the top cover back into the board connector. Apply pressure evenly across the cable. See Figure 9.
4. Replace 6 screws on the back plate. See Figure 2 for screw locations. Do not over tighten. When reinstalling screws, do not over tighten.
5. Align and apply the rear label. If the original label was removed intact it can be re-used. If it was damaged, you can install the replacement label included in your service kit. If you used the replacement label, ensure the serial number label is transferred from the old label. This label is delicate and extra caution should be used when removing it.
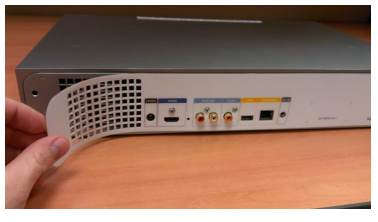
Figure 10
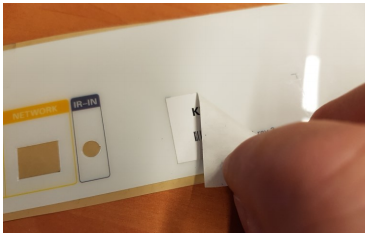
Figure 11
