Disc Vault - Disc Removal Procedure
Follow this procedure to remove discs from a Kaleidescape M700/DV700 Disc Vault to prepare it for return shipping, if the vault will not power on or front panel eject options fail. This procedure may only be performed after you have contacted Kaleidescape Support and a Return Merchandise Authorization (RMA) has been issued for the disc vault. Do not perform this procedure just to remove discs from the vault.Before You BeginAttempt to Eject All Discs
Before beginning the manual disc removal procedure, attempt to eject all discs by each available method.
1. Front panel buttons
2. Browser interface
3. Onscreen display (vault must be connected to a display)
NOTE: Check to make sure you are selecting the correct disc vault when ejecting using the browser interface or onscreen display.PreparationTools and Materials
Tools and Materials You will need the following in order to manually remove discs and prepare the Disc Vault for shipping.
- Box knife
- 2 mm hex screwdriver or Allen key
- 2.5 mm hex screwdriver or Allen key
- 4 mm hex screwdriver or Allen key
- Phillips screwdriver
- Protective casing for each disc being removed
- Container for collecting screws as they are removed
- Original packaging for shipment.
NOTE: Shipping a Kaleidescape Disc Vault in unauthorized packaging may void the limited warranty. Contact Kaleidescape Support to purchase new packaging: +1 (650) 625-6160
Powering Off and Disconnecting
Disconnect the power cord, Ethernet and audio/video cables from the back of the disc vault.Manual Disc RemovalIf some discs cannot be ejected by any of the methods, proceed with manual disc removal.
1. Remove the front panel by gripping each side and pulling it straight from the disc vault. See Figure 1.
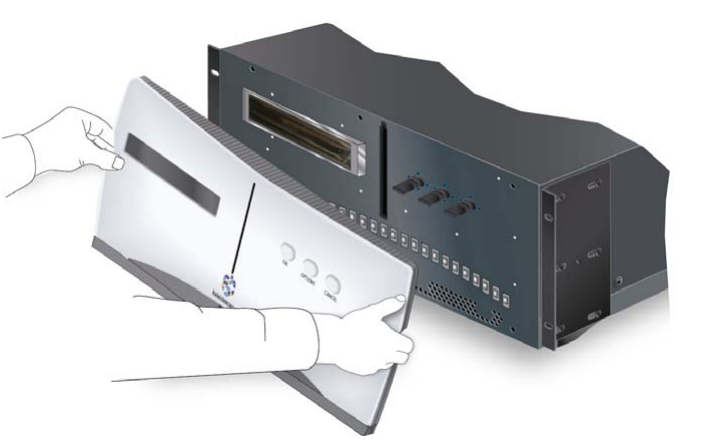
Figure 1 Removing the Front Panel
2. Remove the disc vault from the rack. Use a Phillips screwdriver to unmount the ears from the rack. A two-person lift technique is required to safely remove a loaded disc vault from the rack.
3. Take off the rack ears, using a 2.5 mm hex screwdriver to remove the 7 screws that hold them on each side of the chassis. See Figure 2.
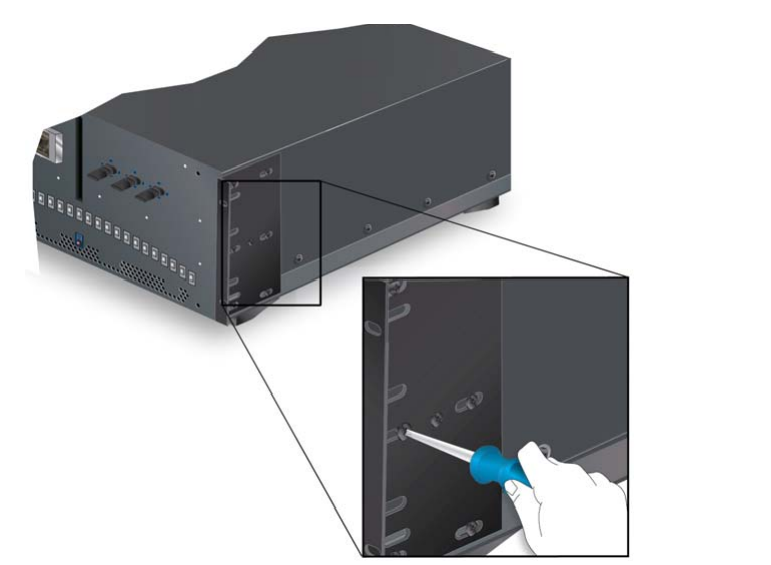
Figure 2 Removing Rack Ears
4. Remove 6 screws from the back, using the 2.5 mm hex screwdriver. See Figure 3.
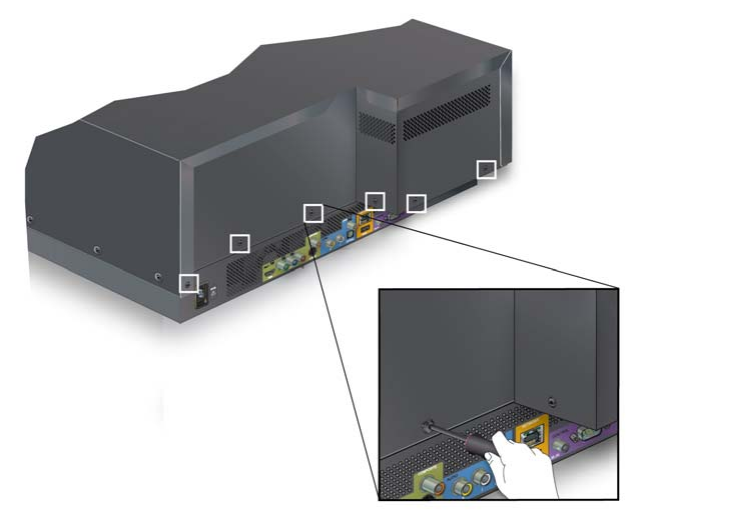
Figure 3 Removing Screws From the Back
5. Cut the warranty sticker with a box knife.
NOTE: Cutting the warranty sticker will not void the warranty if Kaleidescape Support has already issued an RMA for the Disc Vault and sent this document to you.
6. Remove 7 screws from the longer side. Do not remove the screw marked in red. See Figure 4.
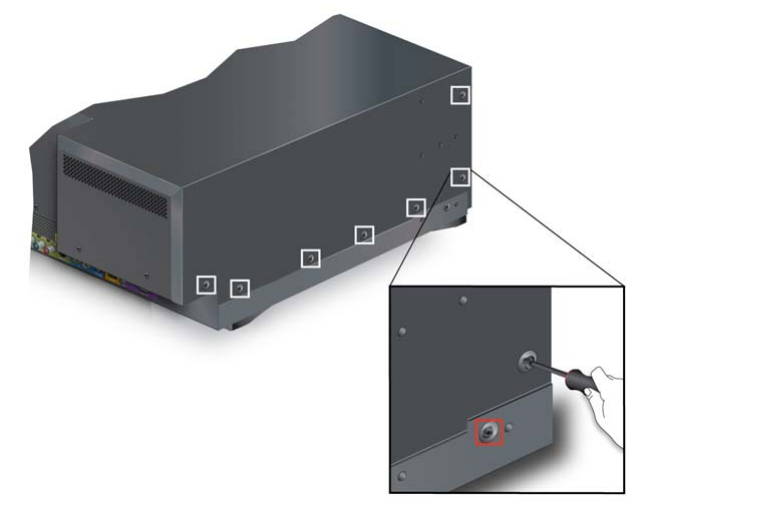
Figure 4 Removing Screws from the Longer Side
7. Remove 6 screws from the shorter side. Do not remove the screw marked in red. See Figure 5
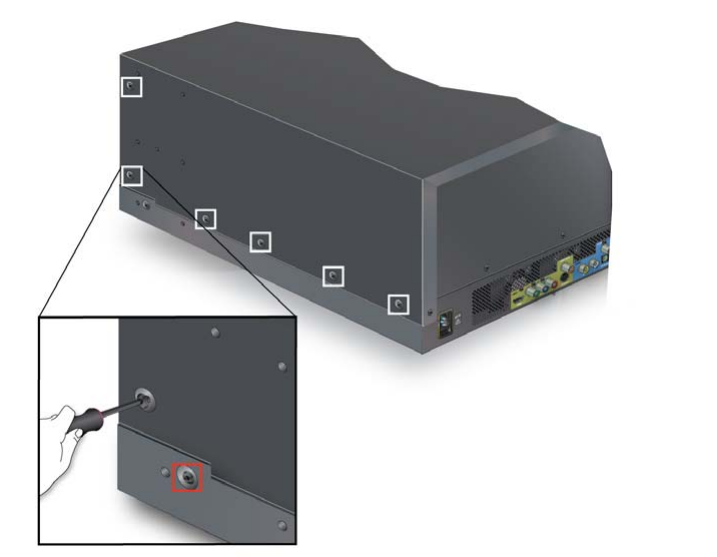
Figure 5 Removing Screws from the Shorter Side
8. Take off the casing by sliding it back towards the rear of the vault. Then lift it off. See Figure 6 and Figure 7.

Figure 6 Sliding Casing Back
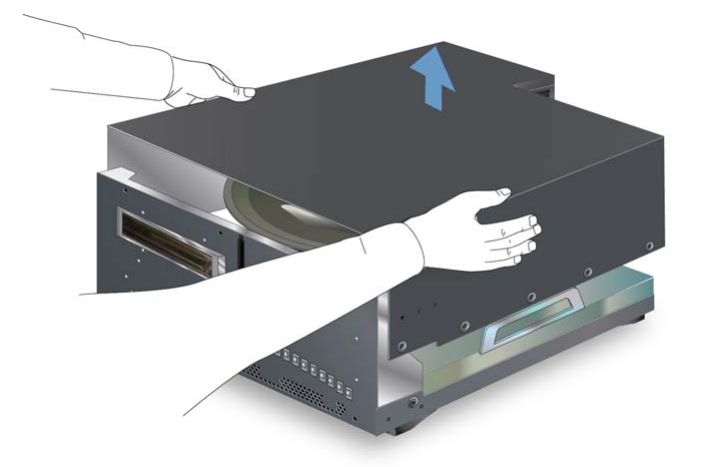
Figure 7 Lifting Casing Off
9. Remove the 4 screws that hold the disc retention funnel to the roller brackets at the edges, using a 2 mm hex screwdriver. Remove the center screw, using a 4 mm hex screwdriver. Then lift the disc retention funnel off the base of the carousel. See Figure 8.
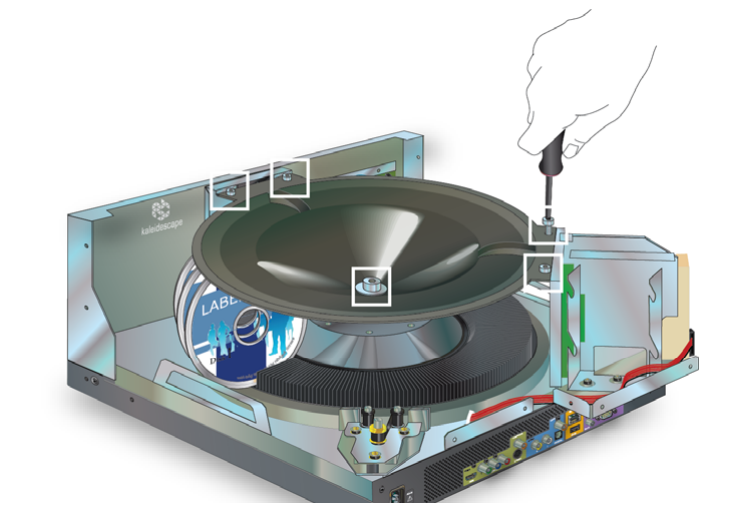
Figure 8 Removing Disc Retention Funnel Screws
10. Now that the carousel is exposed, remove the discs, placing each one in a protective case. See Figure 9
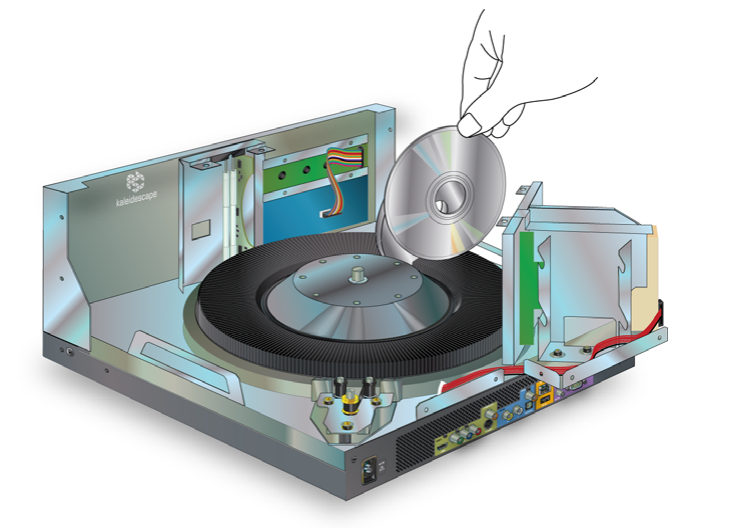
Figure 9 Removing the DiscsPrepare Disc Vault for ShippingReplace the Disc Retention Funnel and Casing
1. Place the disc retention funnel back on top of the carousel and secure it with 4 screws that hold it to the roller brackets at the edges, then one in the center. See Figure 8.
2. Replace the casing. Set it over top of the chassis 1-1/2” toward the back. Then slide the casing forwards into place. Check that the screw holes line up.
3. Loosely replace 6 screws on the back.
4. Replace 7 screws on the longer side and 6 screws on the shorter side.
5. Tighten all the replaced screws.
6. Replace the rack ears on each side with the “ears” to the front. Loosely fasten the center screw first, then tighten all 7.
7. Replace the front panel by lining up the metal tab at the bottom inside of the panel with the slot in the front of the chassis. Press firmly and evenly to snap the panel into place.
8. Place the disc vault in the original packaging for shipping, being sure to line it up with the molded packing material inside. See Figure 10.
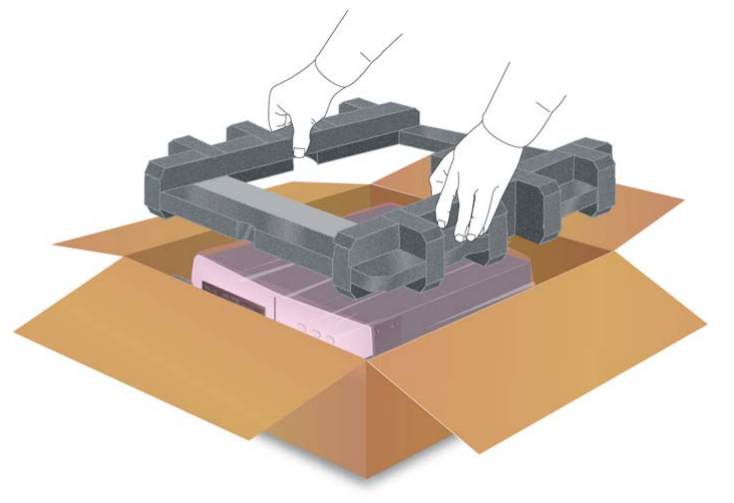
Figure 10 Packing the Disc Vault
