How do I add a new disk cartridge to my Premiere server?
To install a new disk cartridge in a Premiere server, remove a blank cartridge and insert the new disk cartridge. Do this while the server is powered on.See also
What happens to a server's capacity when a disk cartridge is added?Removing and Adding Disk Cartridges or Blanks
Server disk cartridge slots MUST be filled with disk cartridges or blanks. Disk cartridges can be added to expand server capacity or replaced as needed.
WARNING: Do not operate the server with empty slots. Always use blank cartridges to fill slots. Open slots compromise the cooling system.
When a Disk Cartridge Can Be Removed
If a server is powered on, the disk cartridge can be removed ONLY under the following conditions:
- Disk cartridge status light glows amber which indicates that the disk should be removed.
- Disk cartridge status light is unlit indicating that the disk is not being recognized at all. (This could be just a seating problem.)
If more than one disk cartridge status indicator glows amber or is unlit on the same server, turn the server off immediately by pressing the POWER button, and contact Kaleidescape Support at +1 650-625-6160 or send a message to support@kaleidescape.com.
When a Disk Cartridge Does Not Glow Blue
Active disk cartridge status lights glow blue. If a disk cartridge status indicator light fails to glow blue when the server is powered on, it is usually for one of the following reasons:
- The disk cartridge is improperly installed. Power off the server, remove the disk cartridge, and reinsert. Be sure that the disk cartridge is firmly seated.
- The disk cartridge is defective. Power off the server and remove the disk cartridge. Contact Kaleidescape Support for assistance.
- The disk cartridge was previously installed in another server.
Removing and Adding Disk Cartridges
Use the following procedure to remove a disk cartridge or blank from a 3U or 1U+ Movie Server.
1. Access the front panel of the server. 3U Server – Pull down the front panel. 1U+ Movie Server – Tug gently on both sides of the front panel and remove.
2. If the server is powered on, check the status light of the disk cartridge. Only a disk cartridge with a status light that is amber or unlit should be removed when the server is powered on. Power off the server if the disk cartridge to be removed has a blue status light.
WARNING: Do NOT remove a disk cartridge with a blue status light when the server is powered on. This can result in loss of content
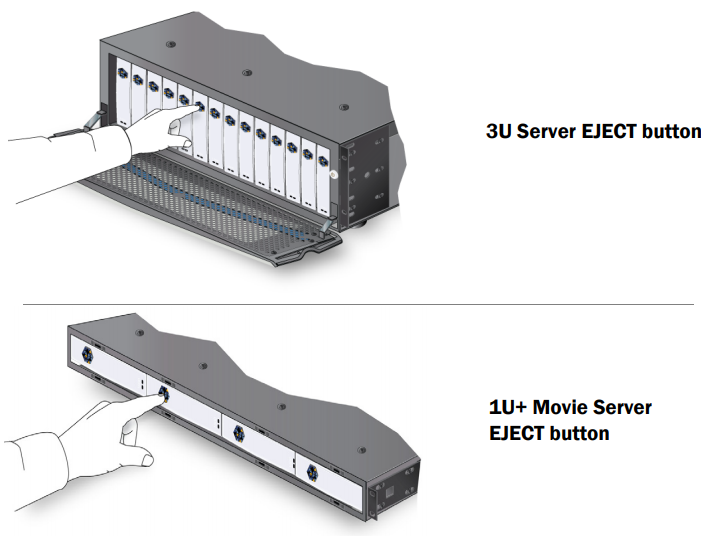
3. When ready to remove the disk cartridge, press the EJECT button (Kaleidescape logo) on the disk cartridge. (Blank cartridges do not have the logo on the EJECT button).
4. Gently glide the disk cartridge out of the slot.
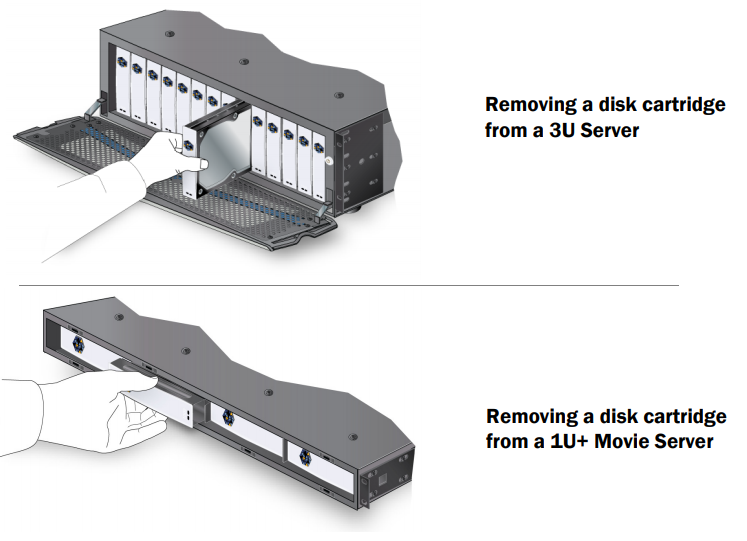
5. Insert the disk cartridge into an anti-static bag and place in a wellpadded container for safe storage and transport.
6. When removing all disk cartridges, make sure the server is powered off and repeat steps 2, 3 and 4 until the server is empty.
7. For the 3U Server, close the front panel. For the 1U+ Movie Server, replace the front panel by aligning the six posts on the rear of the front panel with the slots in the chassis and pushing the panel until the panel snaps into place.
Adding a Disk Cartridge
A disk cartridge can be added at any time to increase server storage capacity or to replace a failed drive, whether the server is running or not. Use the following procedure to add a disk cartridge to a 3U or 1U+ Movie Server.
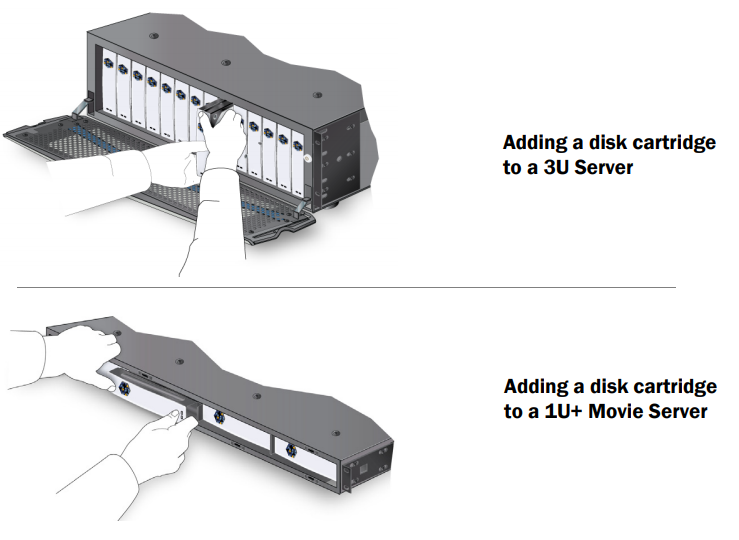
1. Access the front panel of the server.
3U Server – Pull down the front panel.
1U+ Movie Server – Tug gently on both sides of the front panel and remove.
2. Verify that the latch on the disk cartridge works properly. The latch is the gray plastic wedge that extends from the top of the disk cartridge.
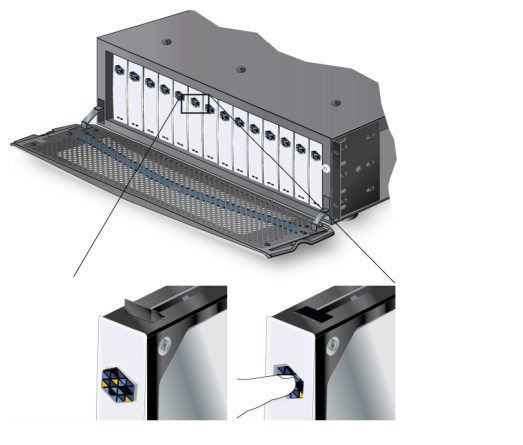
NOTE: The latch is designed to retract when the Kaleidescape logo (or white button on a blank) is pressed, and to pop up and engage with the chassis when a disk cartridge is inserted. If the latch sticks in the retracted position the disk cartridge does not lock in place and cannot operate properly. Note: If the latch sticks, follow the procedure to resolve the problem - Servicing Disk Cartridges with Sticking Latches
3. Align the disk cartridge to the slot. 3U Server – Latch goes to the top with lights at the bottom. 1U+ Movie Server – Latch goes to the left with lights to the right.
4. Insert the disk cartridge into the open slot. Push firmly but gently until the disk cartridge clicks into place. Do NOT slam the disk cartridge.
5. Verify that the disk cartridge status light glows blue.
NOTE: If replacing a single failed drive on a 3U Server, the newly installed disk cartridge usually becomes the new hot spare. The blue status light on the hot spare disk cartridge blinks at two second intervals.
6. For the 3U Server, close the front panel. For the 1U+ Movie Server, replace the front panel by aligning the six posts on the rear of the front panel with the slots in the chassis and pushing the panel until the panel snaps into place.
